¶ ⚓ Creating
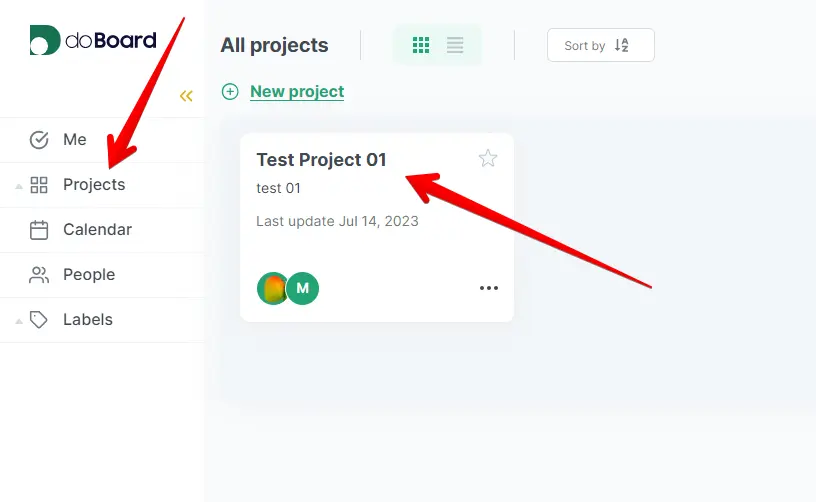
1. Go to Projects and click on any project you want to create a new task in it:
2. Click the New task button:

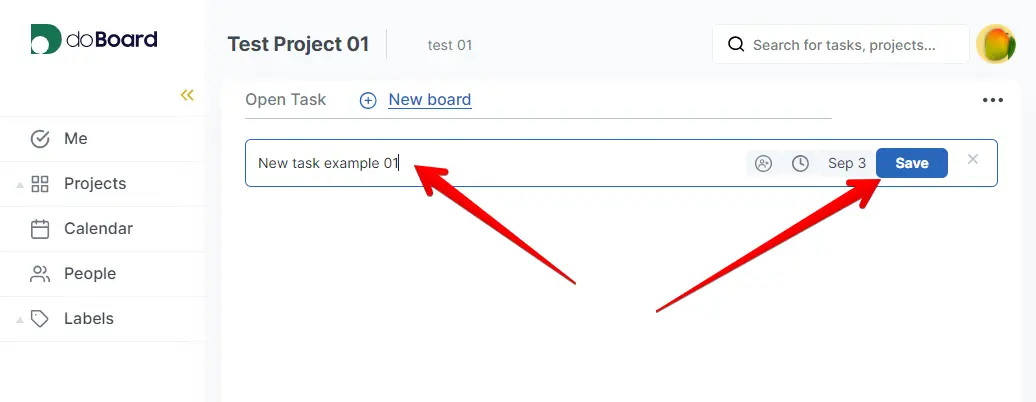
3. Type your task name and click the Save button:
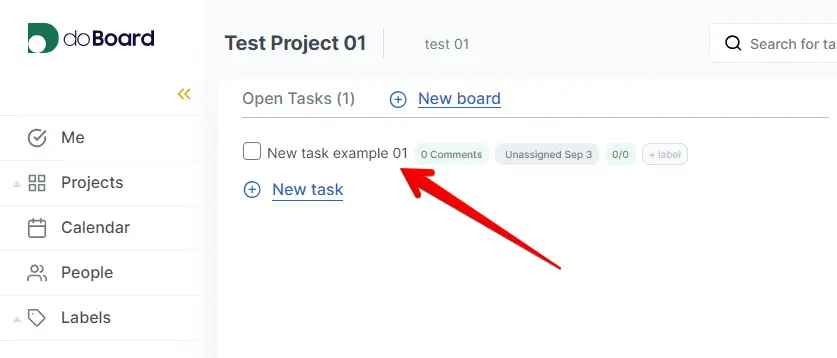
4. Done!
¶ ⚓ Editing
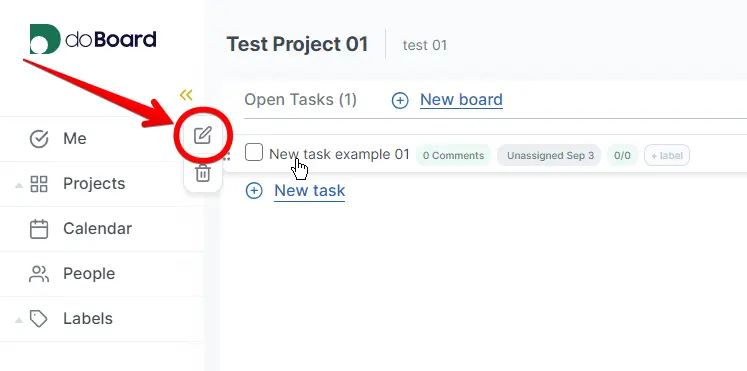
1. Hover our mouse over the name of any task and click on the icon with a pencil:
OR
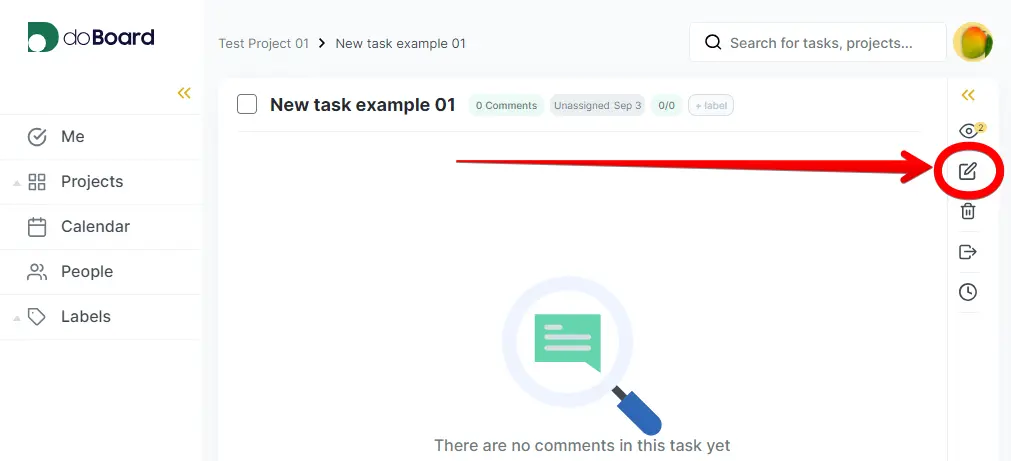
Go to any task and click on the icon with a pencil in the right menu:
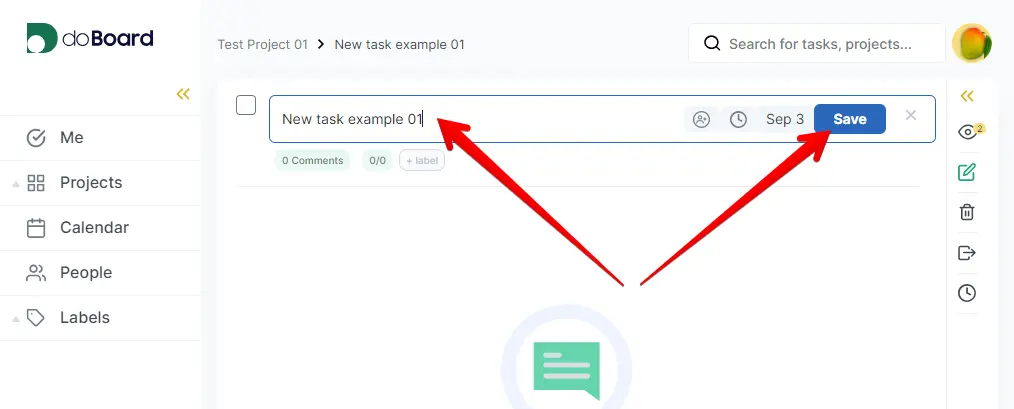
2. Now you can edit the chosen task, then click the Save button:
¶ ⚓ Labels
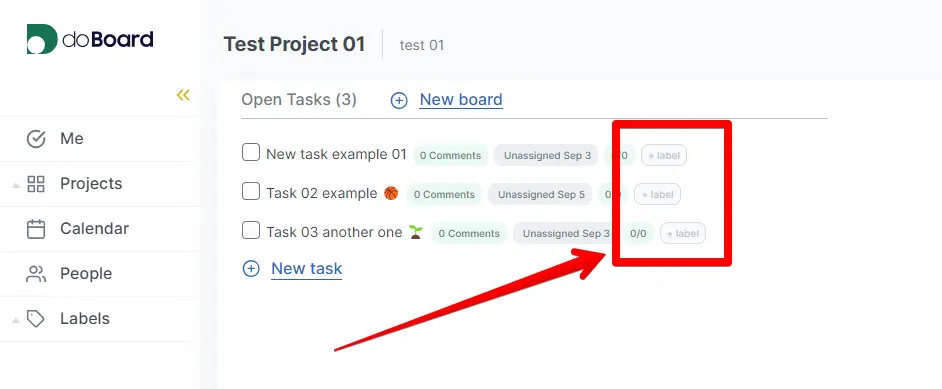
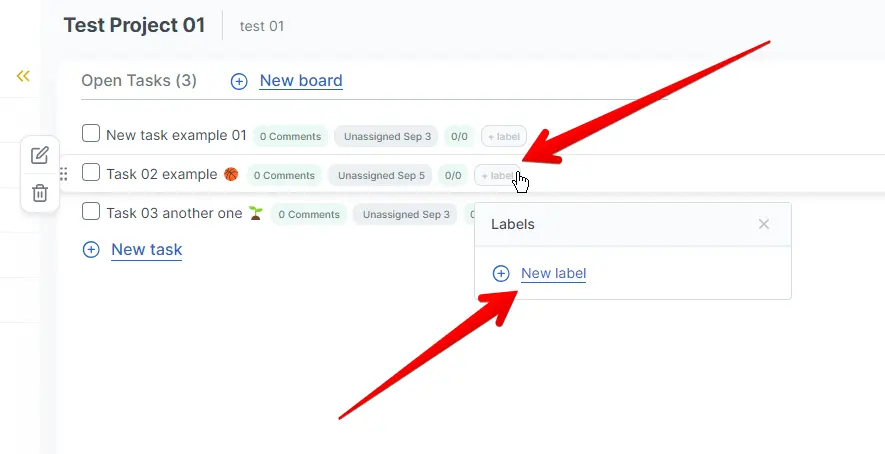
1. Click the +label button in the task name row:
2. In the popup window click the New label button:
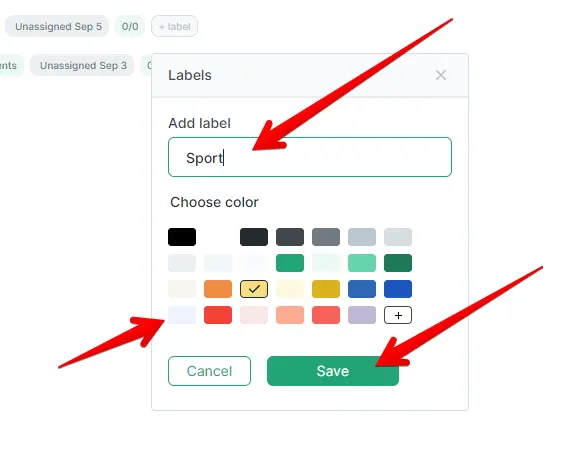
3. Give your new label a name, color and click the Save button:
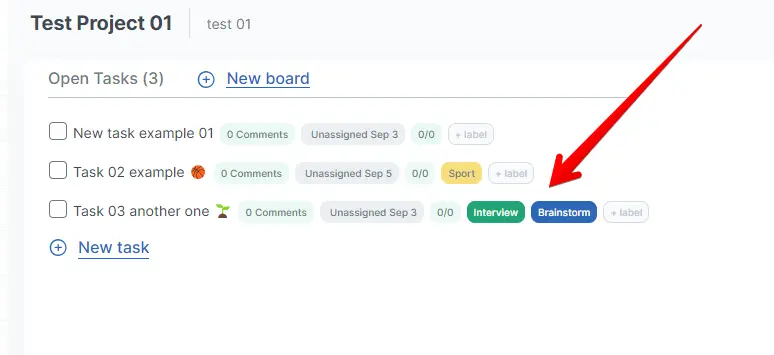
4. Done! You can apply several labels to any task:
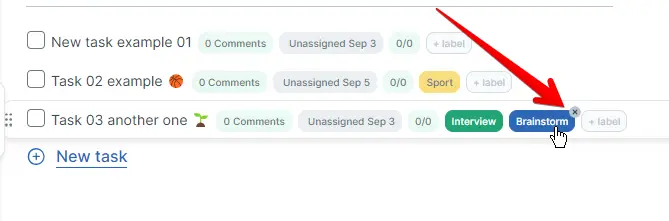
5. To delete a label simply click the cross button when you hover your mouse over it:
¶ ⚓ Assigning to a person
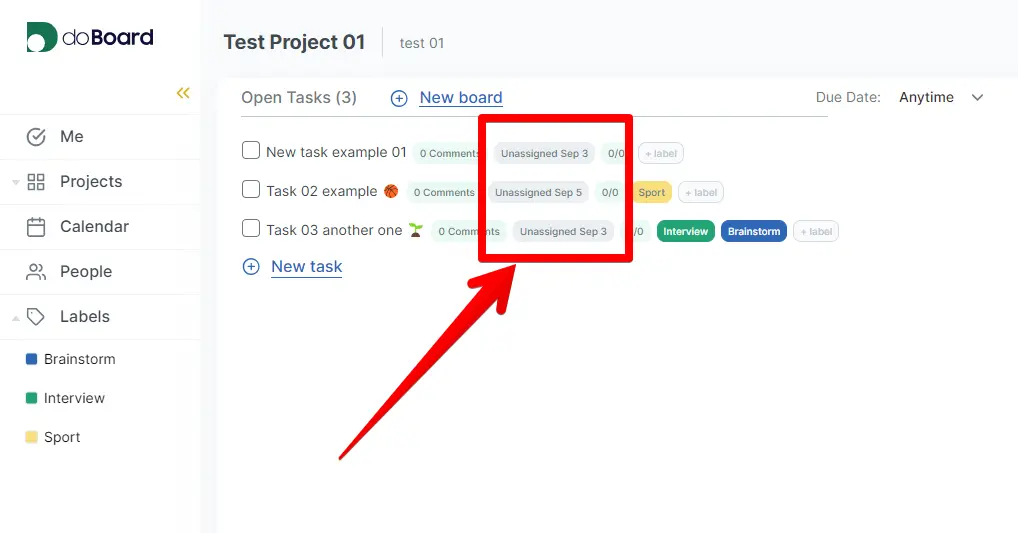
1. Go to any of your projects, you will see the list of the tasks. Each task has a plate with the assigned person (or Unassigned) and due date (or empty date). Click on that plate to assign or re-assign the task to a new person:
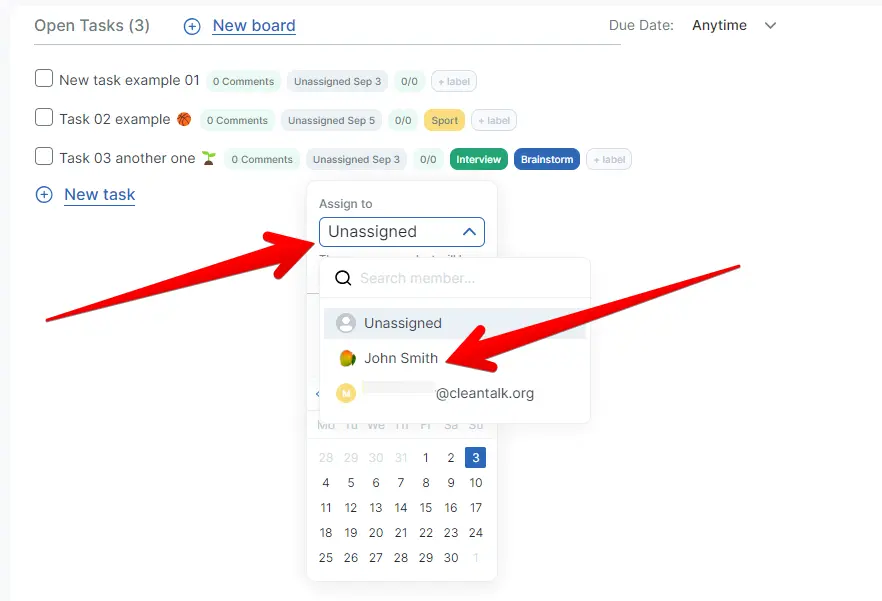
2. After clicking select a person in the dropdown menu:
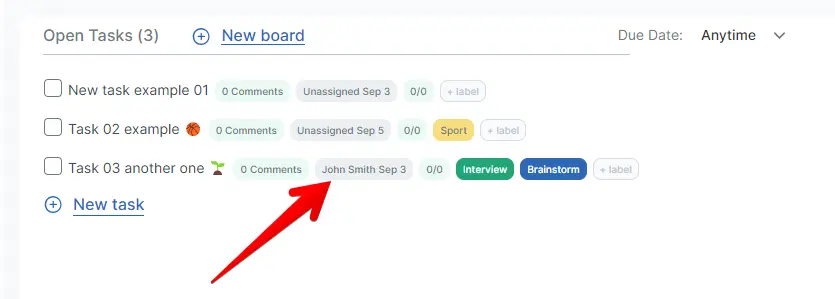
3. Done!
¶ ⚓ Due date
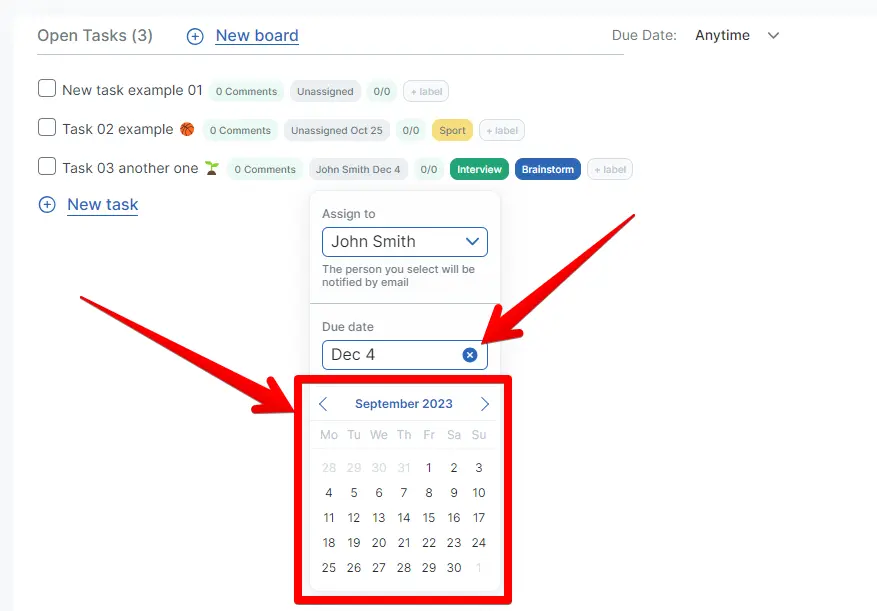
1. The same process is for settings a due date. In the task name row, click on the plate where the assigned person (or Unassigned) is located:
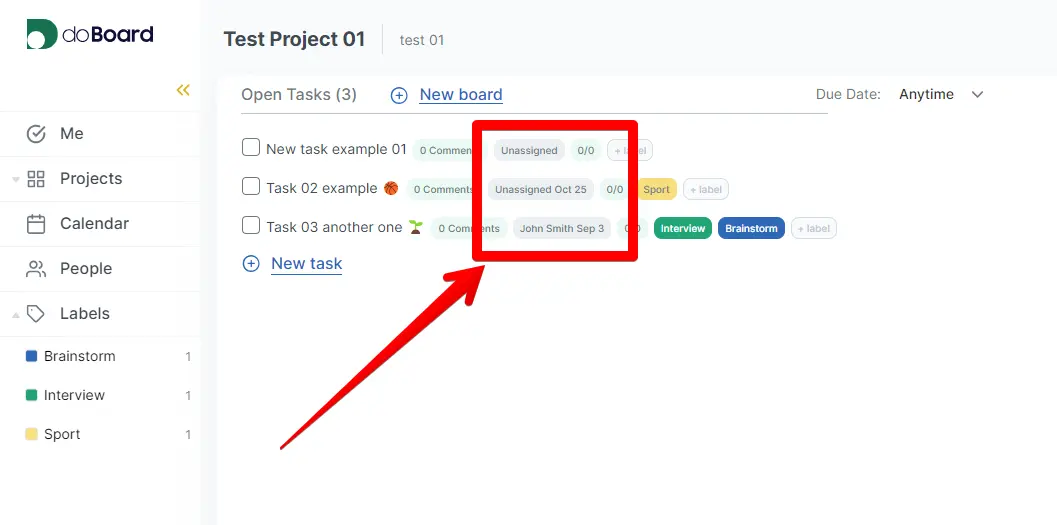
2. In the dropdown menu use the calendar to set a Due date for the task or remove it by clicking the blue circle with a cross. Done!
¶ ⚓ Time spent
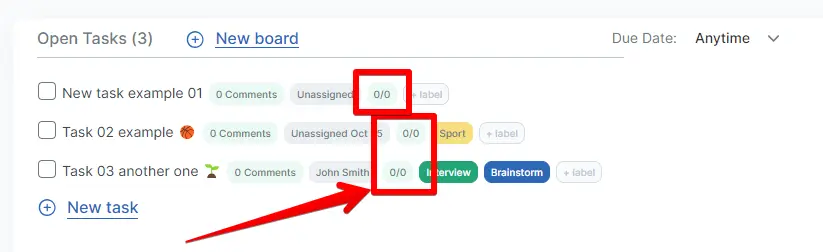
1. If you want to set the estimated time of completion for a task, click on the 0/0 plate next to the assignment plate in the task name row:
2. In the dropdown menu select a person and set the number of hours and minutes the selected person should spent on this task. Then click Save:
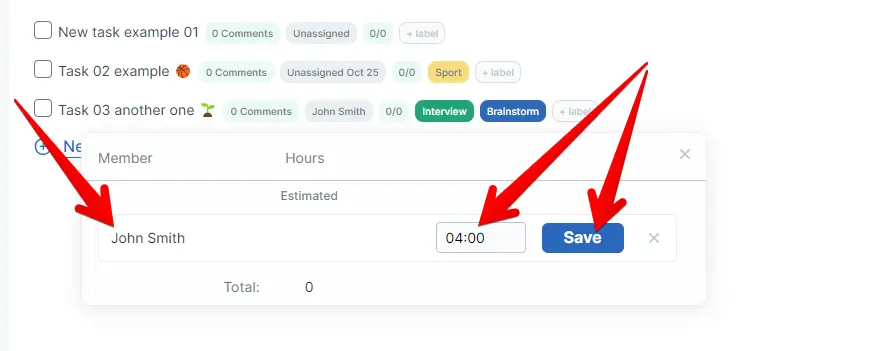
3. Done! You can repeat this process for any involved person or delete the estimated time by clicking on the trash can icon:

¶ ⚓ Deleting
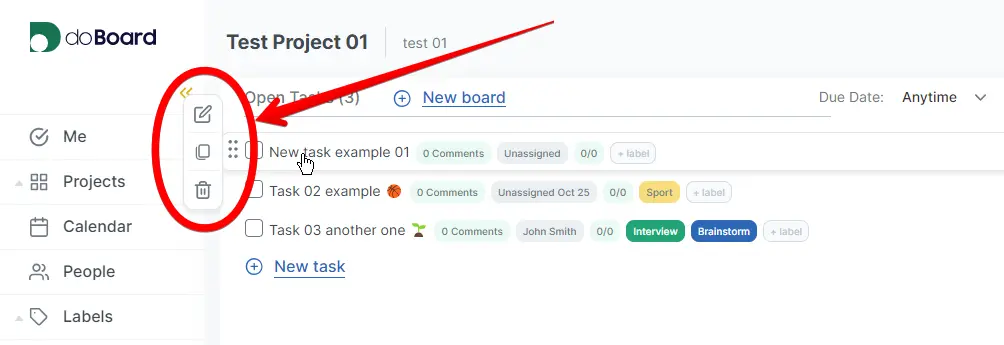
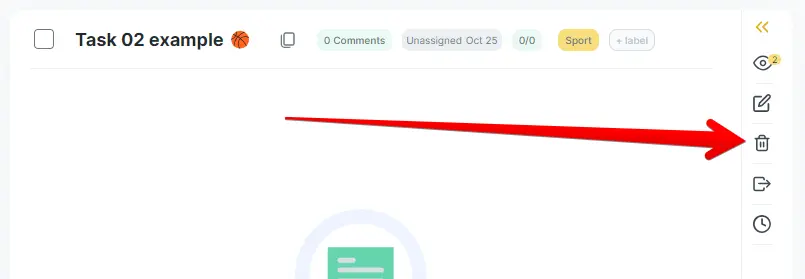
1. Deleting a task is very easy. Hover your mouse pointer over the task name, then a small menu on the left will appear. Click on the trash can icon:
OR
Go to any of the tasks and click on the same trash can icon in the right menu:
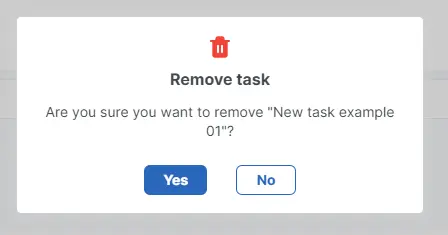
2. Confirm your action. Done!
¶ ⚓ Subtasks
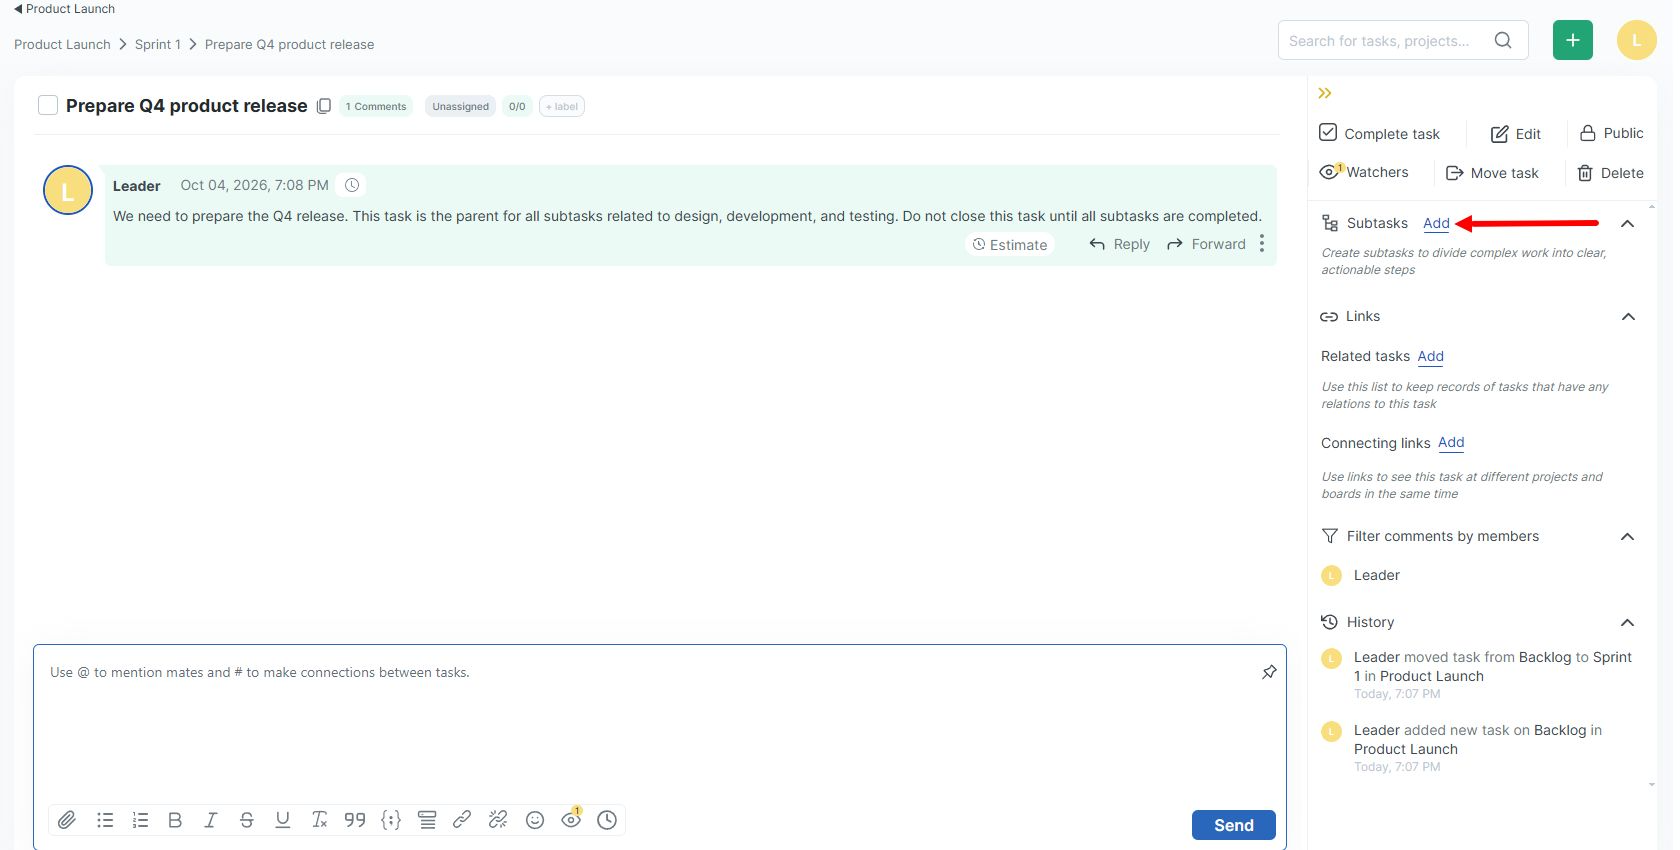
1. Open the task that should become the parent. In the right panel (task menu), find the Subtasks section and click the Add button.
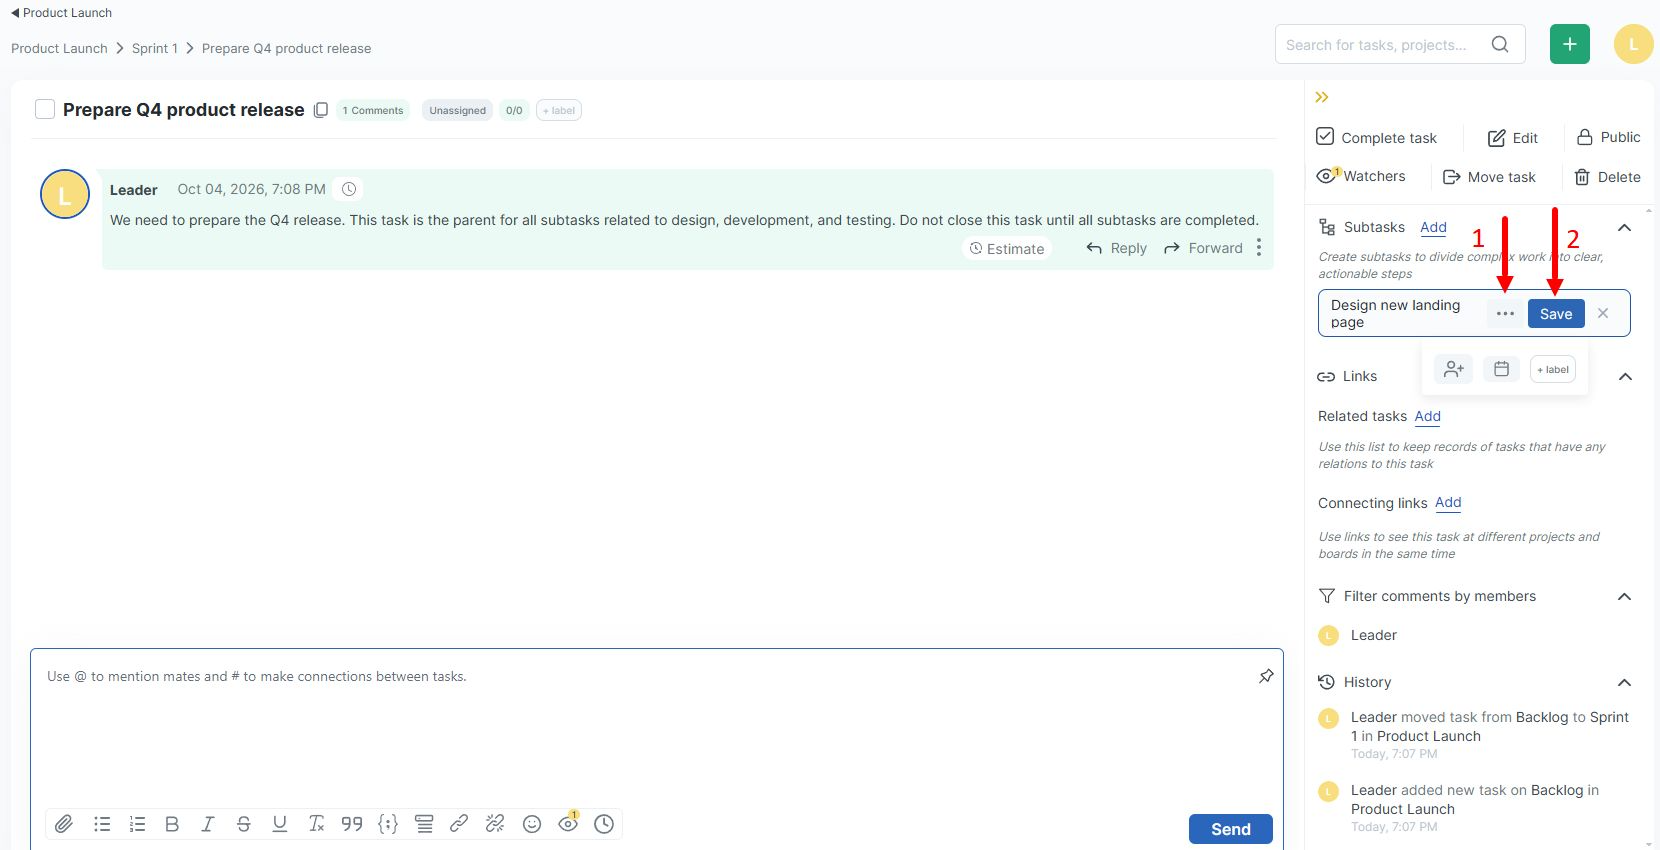
2. Enter a name for your subtask. To set it up further, click the three-dot menu (marked as 1 in the screenshot). From there, you can assign a responsible team member, set a due date, and add a label. Once everything is set, click Save (marked as 2 in the screenshot).
3. The subtask you created now appears in the Subtasks menu. As long as it remains open, the parent task cannot be closed — this ensures no part of the work is completed or forgotten.
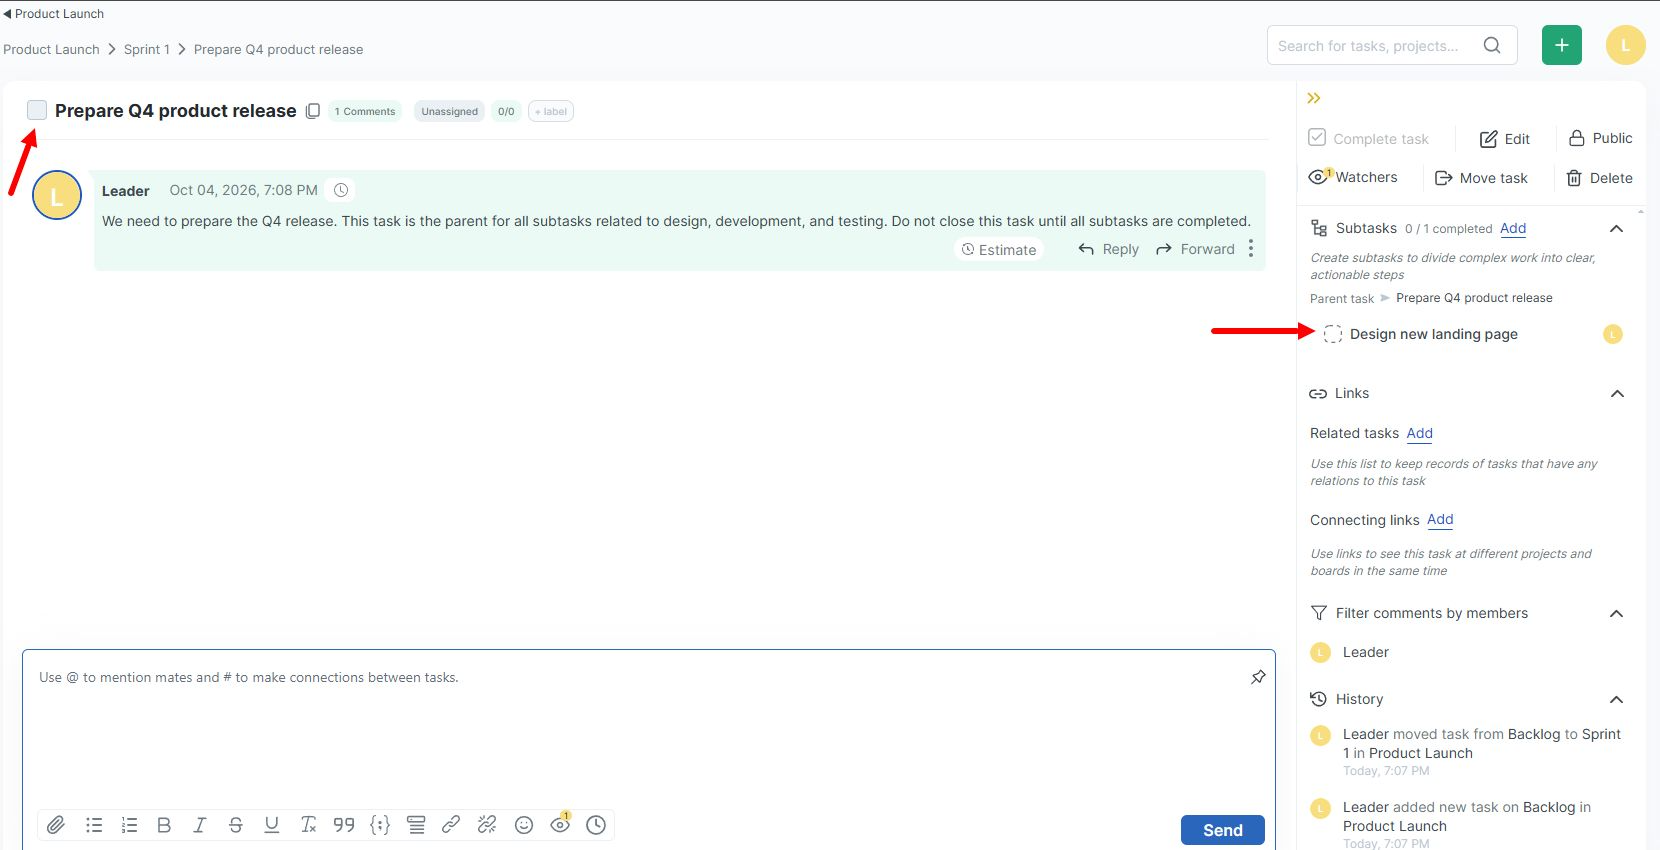
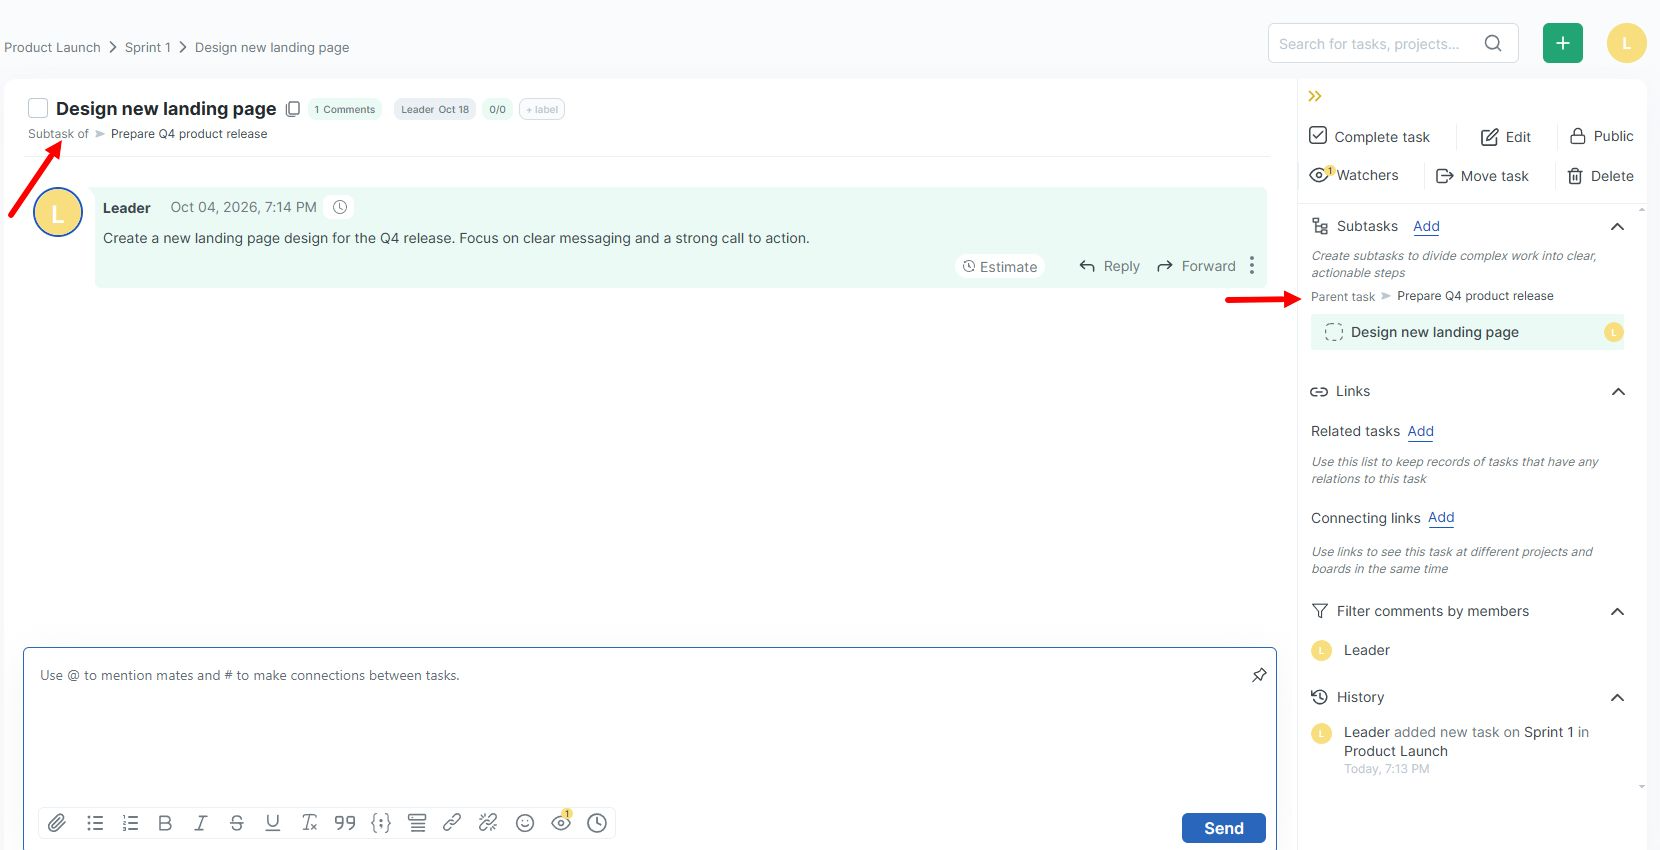
4. Open the subtask you created. At the top of the task, you will see a note showing that this task is a Subtask of a specific parent task. This makes it clear where the subtask belongs in the overall structure. The relationship tree is also displayed directly in the task menu, and each related task shows a link counter.
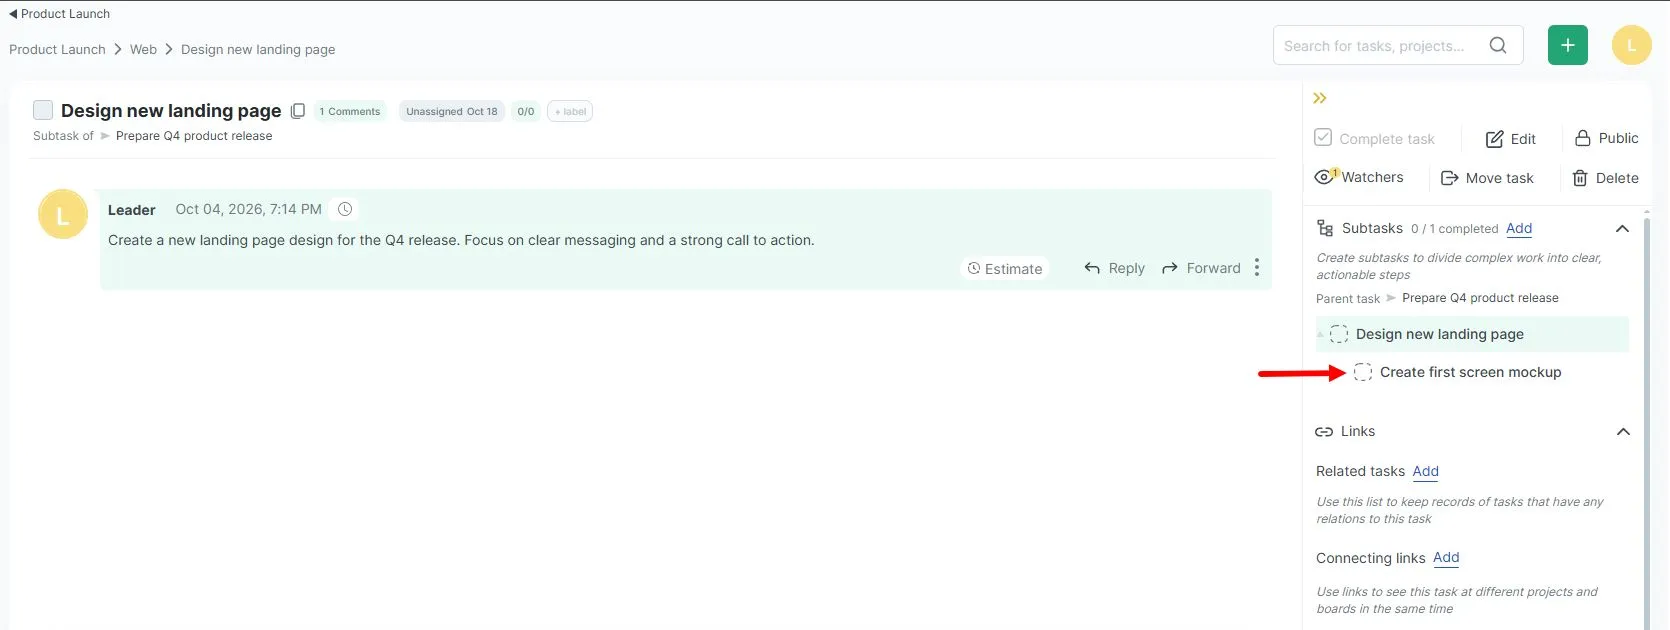
5. Subtasks can have their own subtasks. Open the subtask you just created and repeat the same steps — the Subtasks section works exactly the same way here. This lets you build a multi-level structure where a large task is broken into subtasks, and each subtask is broken down even further. There is no limit to how deep the hierarchy can go, so you can keep dividing work until every step is small and clear.
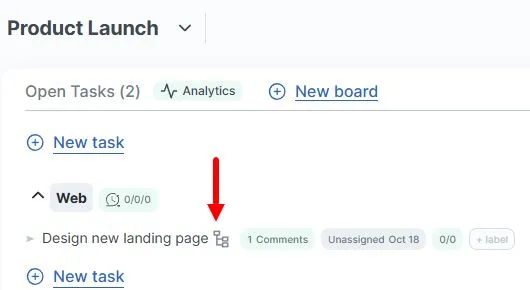
6. Tasks with subtasks are easy to spot in the task list. You don't have to open a task to know it has subtasks — the list shows it right away. A task that contains subtasks is marked with a special icon, so you can instantly tell it apart from a simple, single-level task.